Analytics in a different way

Hi there 👋, welcome to my blog, where I share my learnings and tools that might be helpful to you. I wanted to track the reach of my content to help me create even better content!
Idea💡
The idea was simple: I needed to store page-view counts. I could have implemented this using Vercel or Google Analytics, but I decided to go in a different direction for this implementation.
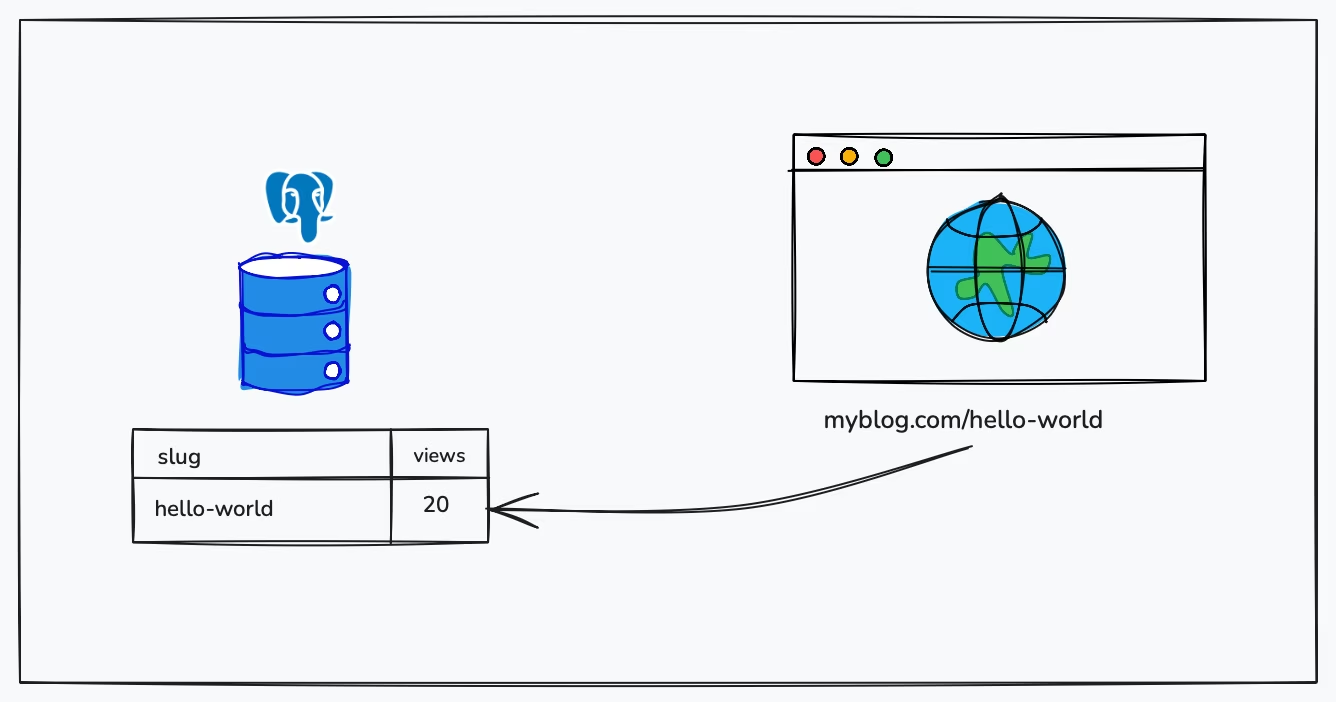
- I’ll have a website URL-to-count mapping in the database.
- So when you visit my blog, I’ll store the view count associated with the URL. Simple, right?
Tech used
Neon DB
It’s a Postgres database with a free tier of 512MB storage, which is perfect for my use case. I wanted to try out Postgres, so I gave it a shot. Here are some free Postgres database providers you can try:
Drizzle ORM
Instead of writing raw database queries, using an ORM provides predefined methods to interact with the database. Drizzle generates the Postgres queries needed for table creation and migrations. Here are some popular JavaScript ORMs:
Process
The process is quite simple, we need to build a counter app. I’m using Next.js, a full-stack framework based on React, which lets you write both frontend and backend code in one place. Let’s start coding!
- Install these dependencies
pnpm i @neondatabase/serverless drizzle-orm

# add drizzle-kit as dev-dependency it's used for postgres queries generation
pnpm i drizzle-kit --save-dev- Let’s create drizzle.config.ts file in our root directory, where we can specify path of schema file
import { defineConfig } from "drizzle-kit";

export default defineConfig({
  schema: "./app/db/schema.ts",
  out: "./app/db/migrations",
  dialect: "postgresql",
  dbCredentials: {
    url: process.env.DB_URL!,
  },
});- Let’s define schema for our database👇
import { text, integer, pgTable } from "drizzle-orm/pg-core";

// i created a viewCount table with slug & views column
export const viewCount = pgTable("viewCount", {
  slug: text("slug").notNull().unique(),
  views: integer("views").notNull(),
});- Create a method to interact with the database, so we can use it in our API.
import { drizzle } from "drizzle-orm/neon-http";
import { neon } from "@neondatabase/serverless";
import * as schema from "./schema";

// add the database url from NeonDB
const sql = neon(process.env.DB_URL!);

export const db = drizzle(sql, {
  schema,
});- Add these script to package.json file for generating database migration files
{
  "db:generate": "drizzle-kit generate"
}- Now we can push the generated database migration files to NeonDB using this command:
npx drizzle-kit push- Create the POST method to increment the count in the database. Create an api/views/route.ts file:
// the db method which we've written previously
import { db } from "@/app/db/db";
// import the viewCount schema
import { viewCount } from "@/app/db/schema";

export async function POST(request: Request) {
  const slugDetails = await request.json();
  // getting the slug from request body
  const { slug = "" }: { slug?: string } = slugDetails;

  try {
    // checking whether the url already exists in our database or not
    const existingRecord = await db
      .select()
      .from(viewCount)
      .where(eq(viewCount.slug, slug))
      .execute();

    // if it exsists increment the count
    if (existingRecord.length > 0) {
      await db
        .update(viewCount)
        .set({ views: sql`${viewCount.views} + 1` }) // Increment views by 1
        .where(eq(viewCount.slug, slug)) // Use eq here as well
        .execute();
    }
    // else create url with count 1
    else {
      await db
        .insert(viewCount)
        .values({
          slug,
          views: 1,
        })
        .execute();
    }

    return NextResponse.json(
      { message: "Successfully Incremented Count" },
      { status: 201 }
    );
  } catch (error) {
    if (error instanceof Error) {
      return NextResponse.json({ message: error.message }, { status: 500 });
    }

    return NextResponse.json(
      { message: "Failed to increment count" },
      { status: 500 }
    );
  }
}
🔒Security
The APIs I wrote are public and can be spammed, which can mess up the analytics. I need to rate-limit the API requests 🤔! Since these APIs are public and we don’t have an authentication layer, using a secret-key method won’t work. I asked my mentor, and he suggested IP whitelisting.
What is IP Whitelisting?
It’s the process of storing the IP address from a user’s request, so we can validate it for future requests. I had two options to tackle this:
- Store the data in my database, but there’s no automatic way to clear the database entries after some time.
- Use something that can store data and automatically delete it after a period of time.
Redis
Redis is an in-memory data store often used for caching, providing high-speed data access with the ability to automatically expire data after a specified duration. Here are few providers who’re providing free tier Redis
Upstash
I choosed upstash, it has 10,000 commands free daily, now storing data in redis is simple it’s like storing data with JSON pair. Similar like react-query setQueryData & getQueryData. Here is the example for rate-limiting
# ratelimit package is for rate-limiting & redis is for connecting to redis
pnpm i upstash/ratelimit @upstash/redis- Let’s create a method to interact with the redis database
import { Redis } from "@upstash/redis";

export const redis = new Redis({
  url: process.env.REDIS_URL!,
  token: process.env.REDIS_TOKEN!,
});- Now let’s rate limit our POST method
import { Ratelimit } from "@upstash/ratelimit";
import { redis } from "@/app/db/upstash";

// here i've created a rate limit for 1min
const ratelimit = new Ratelimit({
  redis, // i've passed the redis database
  limiter: Ratelimit.slidingWindow(1, "60 s"),
});

export async function POST(request: Request) {
  const slugDetails = await request.json();
  const { slug = "" }: { slug?: string } = slugDetails;

  // extract the IP address from headers
  const requestIP = headers.get("x-forwarded-for") ?? "";
  const fallbackIP =
    headers.get("cf-connecting-ip") || headers.get("x-real-ip") || "0.0.0.0";

  // storing ip with respect to blog url
  const ip = `${requestIP || fallbackIP}/${slug}`;

  try {
    // here we'll pass the ip, if record is not available it'll storing in redis
    // if record already exists in a particular time-frame success will be false
    const { success } = await ratelimit.limit(ip);

    // here i'm returning 429 too many requests in a time frame
    if (!success) {
      return NextResponse.json(
        { message: "Too many requests!" },
        {
          status: 429,
          headers: {
            "Retry-After": "60", // 60 seconds until they can try again
          },
        }
      );
    }

    // your DB process
  } catch (error) {}
}
So yeah everything came out well, so what’s next i need to add comments to blog😅.
Thoughts💭

పిచుకపై బ్రహ్మాస్త్రం, yeah of course this analytics can be acheived simple, well it went this way🤷♂️.
That’s it for this blog hope you enjoyed it! ✌️Peace